What Is A Pop Filter And Do You Need One?
In today’s post, we will take a look at why a microphone pop filter may be an important piece of equipment to have in your home recording studio, we will do that by first answering the question “what is a pop filter?”.
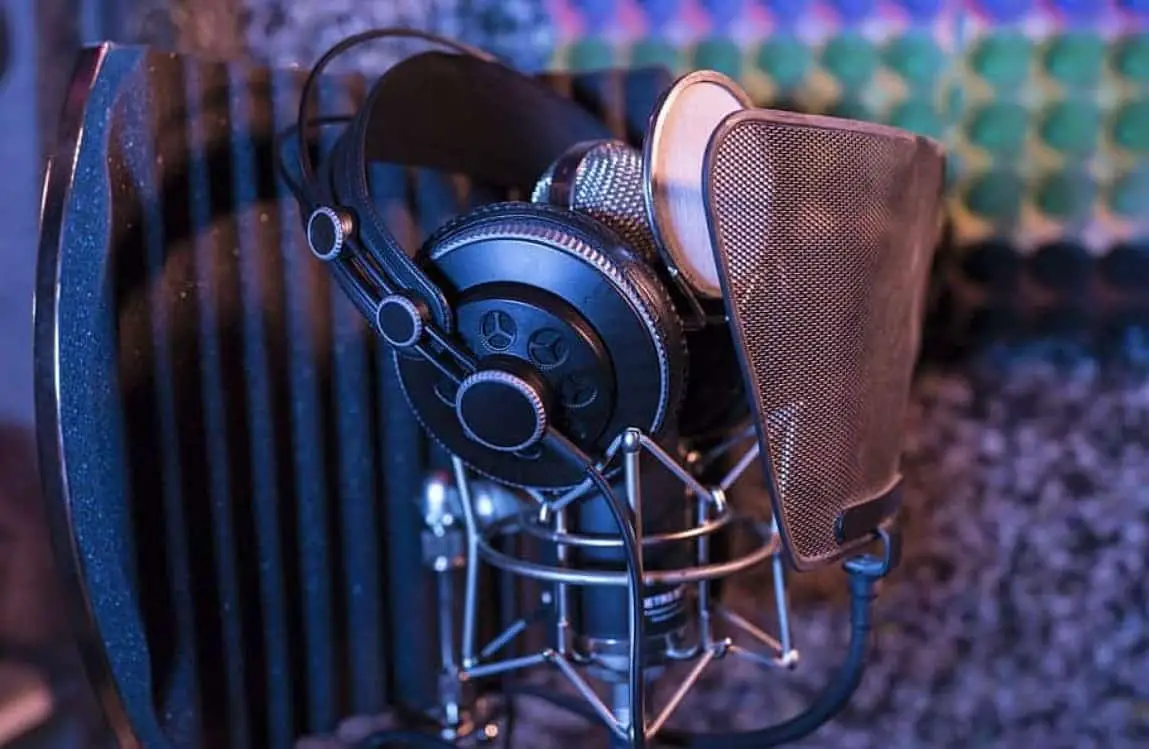
A pop filter is a piece of circular equipment in a studio and is made of nylon mesh and sometimes made of thin metal and is usually positioned a few inches in front of the mic.
If you have been keenly observing the footage of your favorite artist doing a recording in a studio, you possibly saw black equipment standing between them and the microphone, that is what we are talking about.
Usually, the pop filter is clipped to the stand that holds the microphone through a metal gooseneck mount that often is adjustable.
It is a requirement in a recording studio that, when an artist is recording his/her tracks, they have to stand a few inches from the filter.
However, why do you need to do all this? In the first place, what purpose will this filters serve in the recording process?
Table of Contents
What Does A Pop Filter Do?

The answer to the above question is simple and clear. Pop filters usually are used to stop plosives.
Plosives, on the other hand, are blasts of air that comes from your mouth when you produce words that comprise of hard letters. Examples of such hard letters include B, s T, s and P, s.
Mostly when singing, words with hard letters will cause loud blasts of air to enter and head directly to the microphone’s capsule, and they will cause it to overload unpleasantly. This action will obviously cause the mic to “pop”.
Do You Need A Pop Filter?

You definitely cannot avoid all the words with hard letters in your music and what the pop filter does is to filter all those pop sounds out of your vocal sound.
In simpler terms, it completely disperses the air coming from your mouth to different directions making all possible pops to disappear because the sound will not hit the microphone in one big blast.
This ensures that the plosives are not in any way harsh in the recording.
Before making further progress in your recording, it is crucial to understand this fact. Plosives usually sound louder in microphones than it is in the real world.
Therefore, while it might not make sense to always have a pop filter in your bag for every time you sing, a pop filter is must-have equipment every time you are making vocals recordings.
When you are using condenser microphones, plosives are even harsher due to the closer proximity effect that is usually hard to avoid.
When it comes to the proximity effect; this is an instance where the low end of an artist’s voice will get much louder during recording, the artist gets closer to the mic.
To understand the importance of a pop filter in this case, you need to know that a plosive is mostly classified as low-end energy. For this reason, it is amplified more in condenser mics.
This simply means that, when you are using condenser mics in recording, you must have pop filers to enhance the quality of your output.
On the other hand, where you are using dynamic or ribbon microphones, pop filters are not a must.
However, do not get this wrong, pop filters are still beneficial even with this kind of mics.
You would rather use the filters instead of being sorry at the end of your recording session.
[amazon box=”B0002CZW0Y”]It is also essential to understand proper instructions on pop filter use as discussed below.
- For proper use your pop filter, make sure you place it 2-6 inches away from the microphone. Then go ahead and ensure that the singer stands a few inches from the filter for on-point delivery of vocal sounds
- If by any chance, the singer wants to sing directly to the filter, it does not do any harm. This is because it does not in any way, affect the intensity of the plosives. In some cases, some singers will prefer this to ensure that they keep their distance from the microphone consistent.
- However, in cases where the singer has extra loud plosives. Angle your pop filters 30-45 degrees on the upwards or downwards. This will make additional wind dispersal power to your pop filter and less of the air will even reach the microphone
8 Best Pop Filters For Recording Vocals
Condenser vs Dynamic Microphone: What Is The Difference?
How To Make A DIY Pop Filter
Video: “DIY Mic Pop-Filter (Using Home Supplies)”
Sometimes you might be looking forward to recording professional vocals on a limited budget. This means that the cost of purchasing ready made pop filters may be too much cost for you.
The good news is, DIY pop filters will give you a proper perfect answer. Homemade filters are straightforward and quick to make. Let us look at the procedure below:
Step One: Gather Materials
The materials you need are most readily available. They include;
- 2 spring clamps
- 1 pair pantyhose
- 1 cardboard box
- 1 wooden dowel and which should be about 3 feet in length
- Scissors
- Glue
These materials are cheap, and you can find alternatives to serve the same purpose.
Step Two: Cut Apart Cardboard
In this case, you can simply use a utility knife to remove the top of the cardboard box. Next, you will use a pencil to mark the bigger part of the box so that you know how both pieces would line up before you cut them apart.
Step Three: Pantyhose
At this stage, you are required to pull the pantyhose over the inner cardboard ring that you already cut. Then go ahead and put a ring of glue around the outside of the cardboard ring.
The next step will be to slide the outer cardboard ring over the top of the inner carefully. You have to ensure that the pantyhose are pulled together tightly because you need to glue it now. Then place it somewhere safe and have the glue dry.
Step Four: Rod
At this stage, you simply take the scissors and score the rod. Remember that you must move them in a circle to maintain the circular shape. Once you are done with the scoring of the rod, you just bend it over a corner.
Step Five: Add The Rod To Filter
At this stage, you are required to cut off the excess pantyhose from the filter. You will use the scissors to drill a hole that should be small in the edge of the filter. Always remember this important thing; the hole should be small.
Your aim now is to squeeze the rod into that hole barely. Once the hole is big enough, push the rod a little way into the filter. If you find it necessary, you can even glue it.
Step Six: Pun On Microphone Stand And Rock Out
You are now nearing the end of the procedure and the beginning of having your own pop filter! Now, attach the filter to your mic stand. You can use the clips to adjust the height.
I think most people recommend the singer to be two inches from the stand, but I think trying out to play a distance that will bring out excellent sound will be the best thing to do.
At this level, you have an excellent homemade pop filter!
Takeaway
The most important lesson you learn from this article is; you need to have pop filters anytime you want to have professional-sounding vocals.
You definitely need to put in more time and effort to ensure that even if you do not have a high budget to buy ready-made filters you can make homemade ones that are equally effective before you hit the record button.
Start your recording sessions right by ensuring that you get the best pop filter in the current market!


